
Taggies, who doesn’t love them?
When my son was a newborn, finding infant toys that were appropriate and interesting to him was pretty difficult. We were given a couple taggie blankies as gifts and he loved them! Once we had a couple, I knew we needed more! I wanted one for the diaper bag, one for each grandparent’s house, one for both cars, and one or two to rotate in when the others were in the wash…but I thought the price tag was a bit too high for a bunch of snugglies with ribbons. So, I did what any half way crafty mama would do, and decided to try and make them on my own. Let me tell you, he was just as happy with these as the boutique ones!
The awesome part is you can make these with any fabric, you can embroider them, you can add or take away ribbons, and really personalize them for your kids, or for giving as gifts!
**Preface: You do NOT have to be an amazing seamstress to make this taggie! I can hardly sew a straight line, so if you can do that, you are going to be just fine!**
So, what do you need? …Not a whole lot!
-You need a fabric of your choice for the front and the back. I love using minky fabric for the back, it’s so soft and snuggly, and adds to the sensory details for little one!  -You need ribbons, fun ribbons! I usually use 5 different ribbons per taggie. (4 pieces of each)
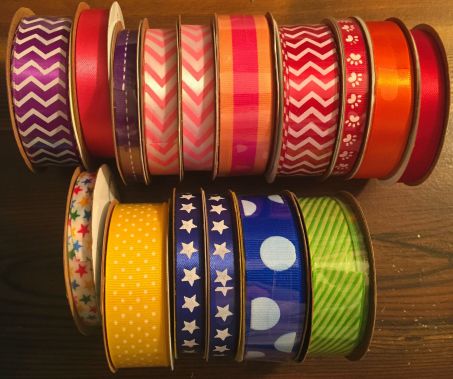 -Scissors and/or a rotary cutter
-Pins -Cutting Mat
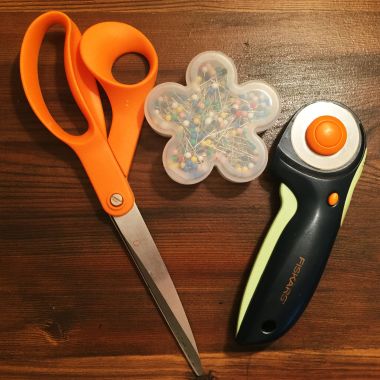 -And of course your sewing machine & thread.
Now…what do you do?!
First – I prefer to wash and iron my cotton fabric before making the taggie. You should NOT iron the minky fabric! It doesn’t wrinkle anyway, and won’t shrink in the dryer, so no worries!
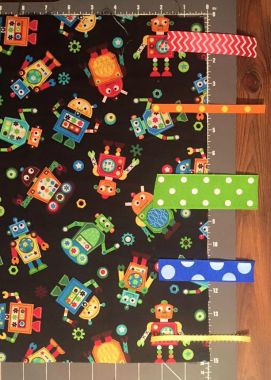
Then, cut a 15X15 square out of your printed and minky fabric.
 Second – Cut your ribbon in 4 -5 inch pieces.

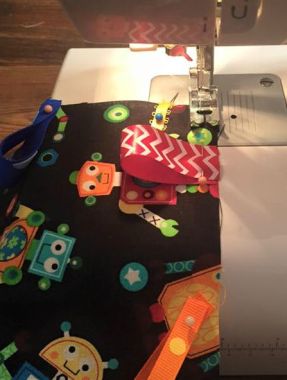
Third – Layout the ribbon evenly on the right side of your printed fabric.
Fourth – I know it looks funny, but fold the ribbon in half, and pin them with ends facing the edge of your fabric. Do this all around each side of your fabric piece.
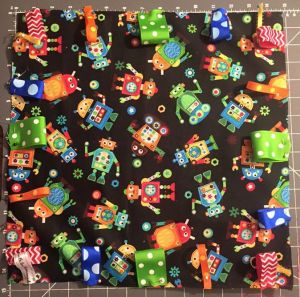
Fifth – Sew all the way around to secure the ribbons in place.
Sixth – Lay down your minky fabric piece placing the right side together with the right side of your printed fabric, and pin it in place.
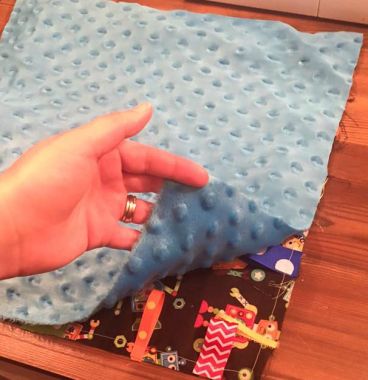
Seventh – Sew the two pieces of fabric together – your ribbons will be sandwiched on the inside – I sew right inside my first seam from sewing the ribbons on.

Eighth – Make SURE to leave a 2-3 inch hole so you can pull your fabric right side out. I have forgotten this step before, and it made me SO angry…don’t forget this!
Ninth – Clip the corners and trim any excess edges before pulling your fabric right side out.
Tenth – Once right side out, pin the opening closed, and sew along all the edges.
Then you are DONE! 🙂
Not too shabby, right?


Like I said, there are so many ways to personalize this, and really make it your own! You could use an old t-shirt, or fabric from something meaningful to you! You can embroider it, quilt it, add crinkly paper to the inside, or whatever you like, there are so many options!
The one below is SUPER special to me!
It’s made from ribbons and fabric that came from a nursery project and our baby shower.
 Happy Crafting! I’d love to see what you create!


I received one of these as a gift as well and my daughter just loved it! Such an easy gift to make and very practical.
LikeLike
Aren’t they great?! Once you’ve made one or two, it’s easy peasy!
LikeLike